Retouch Pro Challenge

Hi everyone! This weeks photography challenge was to take a photo from the website Retouch Pro and do one of the restoration challenges. I chose restore challenge 60 and soon realised it would be extremely challenging. It is my first time properly using Photoshop for retouching. The picture I chose had lots of detail that needed restoring in the face and also a lot of damage on it. I think for my first time retouching a photograph I have done well.

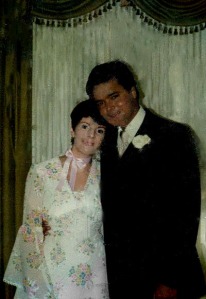
This is the original image:

restore challenge 60As you can see there is a lot of scratches on the image and also a blue hue over the mans jacket. After starting this challenge, I realised that you would need to have knowledge of facial structure when editing this image to get the shape of the mans face right. However, I still wanted to give it a go and see how I would get on.


restore part 2So this is what I have been able to do in Photoshop. There are still some scratches in the image but I had spent a lot of time to even get it to this and think I have done a good job for a beginner. To be able to get it to this stage, I first started off by cropping out some of the original image to make the area smaller to work with. I then applied the Dust and Scratches filter to it, to eliminate some of the major scratches across the center of the image. I used the spot healing brush tool for getting rid of a lot of the white dots around the image. I also used the healing brush tool on the faces as you are able to take a sample of some pixels from another area and then place them on the area I wanted to heal. This meant I could take areas of the man’s face that were the right colour and place them on his chin were the white scratch was. I used the smudge tool to smooth out the colour on the mans jacket and then I added two layers so I was able to adjust the levels of colour in certain parts of the image. I was able to use the magic wand tool to select the mans jacket on one of the layers and adjust that area on its own. As a beginner, I feel this was a touch challenge but I did enjoy it. If any of you have any feedback on how I could make some final improves to it please leave a comment below 🙂 .

Photography Task: Portrait or Landscape?

Hi Guys! For this weeks photography task we had to take a picture shifting between portrait and landscape to show how it can improve the framing of a picture. I went out into my back garden in the house to demonstrate this. After taking a few shots, I was able to pick up on a few different things. Here are the images I took.

LandscapeHere is the landscape image I took. The landscape image is wider and has a view of the whole scene. For taking pictures like this, you hold the camera horizontally. Taking pictures in this format is usually better for taking pictures of scenery, as you don’t cut off parts of the view. You need to think about the composition and see if the scene will look better in landscape or portrait. I feel this one looked a lot better in landscape.

Portrait

The second image here is the same scene except this time in portrait mode. The camera is held vertically for capturing an image like this. For a photograph of a landscape, I think it looks better in landscape orientation as this image looks cut off and does not capture the full scene. Taking a picture of a person can look better in portrait mode as it gets rid of distracting material in the background. Portrait orientation frames a picture which is good for head shots or close ups.

Podcast 2: Publishing and hosting your own Podcast

Hi everyone! I’m back again with another post this time on publishing and hosting your own podcast. Here I will talk to you about outputting your finished podcast, uploading to webhost and creating a podfeed for subscriptions. To get started … Continue reading

Week Four: Shutter Speed Task

Hi everyone! This weeks photography task was the shutter speed task. We had to demonstrate how it has an effect on moving objects. The object had to be captured with different shutter speeds at the same time of day and in the same setting. For this task I chose to take a picture of a fan. I thought it would be a good choice as a fan moves quite fast so I could get a good idea of how the shutter speed works. I have never really adjusted the shutter speed setting on my camera as I wasn’t really sure what it was for, but after completing this task I understand what it does and will use it for pictures I take in the future.

The shutter speed works by changing the length of time that light is let into the lens. A faster shutter speed freezes moving objects while a slower shutter speed creates motion blur of a moving object.

In the first image, I used the highest shutter speed setting on my camera which is 1/125. In this picture it looks like the fan is turned off, which was not the case. It was set to the second highest setting!

In the second image, I set it to 1/8, which created a little motion blur in the picture.

In the final image, I used one of the slower shutter speeds, 2″. In this picture you can tell that the fan is moving as there is a blur on the blades. When using a slower shutter speed, I noticed when you press the capture button, the images takes a lot longer to capture as the camera is lengthening the amount of time the light is let into the lens.

That completes this weeks task and stay tuned for my next post on Publishing and hosting your own podcast!


Aperture task for the week.

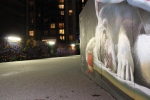
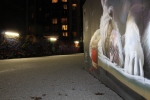
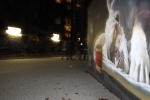
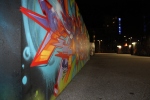
This weeks task was the digital photography assignment. We had to demonstrate the depth of field by changing the aperture settings on the camera. Of course you are not able to just change the aperture to get a good picture. The ISO and the shutter speed must also be changed to get a clear image. With the weather being bad this week it was hard to find a time to go out and get some decent pictures of the images I wanted to shoot, however, this evening was not too bad. I headed over to the beacon south quarter where there is some amazing graffiti artwork to be found.

Here is a gallery of the pictures I took. I think the artwork is quite interesting and I was hoping to capture it well. I tried out loads of different aperture settings, ISO settings, and shutter speeds to try and get a feel for my camera. I used an ISO setting of 1600 for all of my images as this is the optimum setting for dark outdoor scenes on my camera.

In the first image in the gallery, I used an aperture setting of f4 and a shutter speed of 1/15. I found this captured the whole scene well.

In the fourth image, I wanted to create some motion blur on the people walking past so I used an aperture setting of f22 and a shutter speed of 0.5. The shutter speed is what created the blur in scene, as it controlled how long the light was let into the lens for.

In the fifth image, I wanted to highlight the monkey art in the front and blur out the background so I used an aperture setting of f22 and a shutter speed of 1/60.

In the last four images, I wanted to show how changing the aperture could slowly reveal the full scene. I started with an aperture of f22. I then moved onto f16. For the last one I used f4. You can see the skeleton being revealed in the background of the picture as I changed these settings.

After completing this task, I fully understand how the aperture settings on a camera work. By changing this setting, I was controlling the amount of light that was let into the camera lens. This allowed me to capture a whole scene and highlight a particular area of a scene. The higher the f stop number, the less light is let into the lens and the lower the f stop number, the more light is let into the lens. I hope you like the photos I captured! Stay tuned for more posts!